A press-style plunger brewer is a compact, manual coffee device that uses air pressure to extract a concentrated coffee in about a minute. Its simple design and wide range of compatible accessories make it a favorite for home brewers who want control over every variable. This guide covers the essential accessories—filters, caps, funnels, stirrers, scales, and travel gear—and explains two key brewing methods: the standard upright technique and the inverted method, with careful attention to safety.
What the Brewer Does
The press-style plunger brewer consists of a cylindrical chamber, a plunger with a seal, and a filter cap. You add coffee grounds and hot water, stir, then press the plunger through the chamber to force the brewed coffee through the filter and into your cup. The result is a clean, full-bodied coffee that can be drunk as is or diluted with water to make a longer drink. The brewer is praised for its speed, ease of cleanup, and the ability to make a single serving quickly.
Filters: Paper or Metal
The filter is one of the most important choices you make for your plunger brewer. It affects the clarity, body, and mouthfeel of the final cup, as well as the environmental impact and long-term cost.
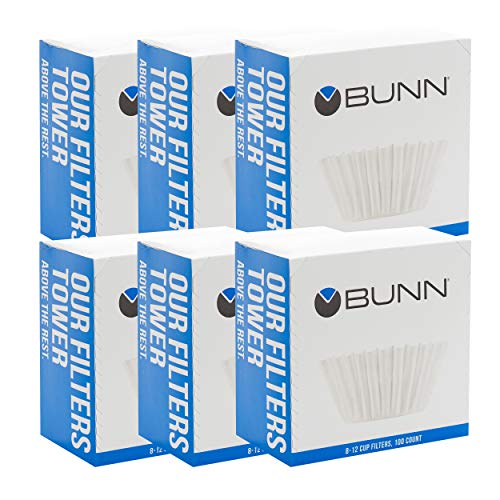
Paper filters (usually micro-pleated or flat disks) trap fine coffee particles and most oils, producing a clean cup with a tea-like clarity and reduced body. They are disposable, so cleanup involves simply rinsing the chamber and tossing the spent puck and filter. Paper filters are inexpensive per use and make for a very consistent brew. However, they generate waste, and you need to keep a supply on hand.
Metal filters (stainless steel mesh disks) let more oils and fine sediment through, resulting in a richer, fuller-bodied coffee with more texture. They are reusable for months or years, which reduces waste and eliminates the need to reorder supplies. Cleaning a metal filter requires a quick rinse and occasional scrubbing with a soft brush to remove trapped oils that can turn rancid. Some brewers notice a slightly slower flow rate with metal filters, especially if the mesh is fine. For a detailed comparison of filter materials, see Paper vs Metal vs Cloth Coffee Filters.
Many home baristas try both types to see which suits their taste. You can also use a combination: a metal filter as a base with a paper filter on top for extra clarity and easy cleanup.
Caps, Funnels and Stirrers
A few aftermarket accessories improve the brewing experience and can make the process more comfortable and consistent.
- Flow-control or pressure caps replace the standard filter cap with a design that has a smaller opening or a valve mechanism. These caps increase the pressure inside the chamber during the press, which can lead to a thicker, more espresso-like concentrate. They also tend to minimize dripping after the press and allow you to stop the flow instantly by lifting the plunger. Some models double as a funnel for adding grounds and water.
- A funnel is a simple plastic or metal ring that sits on top of the brewing chamber. It makes adding coffee grounds much less messy, especially when using a fine grind that can scatter. Many brewers find a funnel indispensable when using a hand grinder that deposits grounds directly into the chamber.
- Stirring paddles (sometimes called a paddle or agitator) help ensure even extraction. After adding water, you stir the coffee bed to break up clumps and fully saturate all the grounds. A paddle shaped to fit the chamber’s diameter or a small spoon works well. Some plunger brewers come with a paddle; if yours does not, any heat-safe utensil will do.
A digital scale is another practical accessory. Weighing your coffee beans and water to a specific ratio—for example, about 1 gram of coffee to 15-17 grams of water—makes your results repeatable. Choose a scale that measures to 0.1 gram for precision and has a built-in timer for timing your steep.
For serving, consider a coffee server or carafe that can hold the concentrate if you plan to dilute it later.
The Standard Method
The standard method is the simplest and safest way to brew with a press-style plunger brewer. It uses the brewer right-side up, with the filter cap attached to the bottom of the chamber. Here is a typical workflow:
- Place a paper or metal filter into the filter cap. If using a paper filter, rinse it with hot water to remove any papery taste and to warm the chamber. Attach the cap to the chamber.
- Set the chamber on a sturdy mug or carafe. Place the mug on a stable, level surface.
- Add your coffee grounds (a medium-fine grind, like table salt). A common starting point is 14-18 grams of coffee for a single brew.
- Pour hot water (just off the boil, around 200°F) into the chamber. Roughly 200 to 250 grams of water makes a full cup; use less if you want a concentrate to dilute later. Stir gently for a few seconds to ensure all grounds are wet.
- Let it steep for 60-90 seconds. Some recipes call for a shorter or longer steep.
- Insert the plunger into the chamber and press down slowly and steadily. Apply even pressure until you hear a hissing sound, which means the water has passed through the coffee bed. Stop pressing immediately.
- Remove the brewer from your cup, unscrew the cap, and eject the spent coffee puck into the trash or compost. Rinse the chamber and plunger.
This method is repeatable and produces a clean cup. It also eliminates the need to flip the brewer, which reduces risk.
The Inverted Method and Safety
The inverted method flips the brewing process upside down: you assemble the brewer with the plunger inserted from the bottom, the chamber inverted (open end up), and the filter cap stored separately. Coffee and water are added into the top of the inverted chamber, then after steeping you screw on the filter cap, flip the entire brewer over onto your cup, and press. This method is popular because it prevents water from dripping through during the steep (since the filter is not yet attached) and can produce a slightly different extraction.
Because the inverted method involves hot water and a delicate handling sequence, safety is critical. Please follow these guidelines:
- Use a stable, level surface. Perform the entire assembly and flip on a countertop that is dry and secure. Do not hold the brewer above your cup until you are ready to flip.
- Ensure the plunger is fully inserted and perpendicular to the chamber. If the plunger is crooked, hot water can leak out during the flip.
- Hold the chamber and plunger together firmly. Grip the chamber near the bottom (the side where the plunger is inserted) and the plunger base with your other hand. Make sure the filter cap is screwed on securely before you flip, so it cannot come loose.
- Flip quickly but carefully. In one smooth motion, invert the brewer so that the filter cap ends up on the bottom, resting on your cup. Let the brewer settle for a few seconds before pressing.
- Press slowly. Just as in the standard method, apply steady, gentle pressure to avoid splashing or blowing the filter cap off.
Despite these precautions, the inverted method carries a higher risk of burns and spills compared to the standard method. Beginners are encouraged to master the standard method first. Some manufacturers explicitly advise against using the inverted method because of safety concerns; always check your specific brewer’s instruction manual. If you do use the inverted method, never leave the inverted brewer unattended, and keep children and pets away during preparation.
Travel Kit
The press-style plunger brewer’s portability makes it a great companion for travel. Many people take theirs on camping trips, hotel stays, or to the office. A well-chosen travel kit includes:
- A hand grinder. A quality hand grinder with adjustable settings lets you grind fresh beans wherever you are. Choose a model that fits inside your brewer’s travel case or can be packed separately. See manual brewing for tips on grinding for different brew methods.
- A travel case. Many third-party cases are shaped to hold the brewer, a hand grinder, a supply of paper filters, and a small scoop. Some include separate compartments for the plunger and filter cap. Cases made of padded fabric or hard plastic protect the brewer from impacts.
- A scale. Compact, lightweight digital scales that fit in a pocket are handy for consistent brewing. Look for one with a tare function and a timer. If you don’t want to carry a scale, you can pre-measure single doses of coffee in small containers or bags.
- Extra filters. Storing a week’s worth of paper filters in a small zipper pouch or the travel case ensures you don’t run out. For metal filters, take a small brush to clean them on the go.
Pack the brewer empty and disassembled to save space. When traveling, you can often brew directly into a hotel mug or your own insulated cup. If you plan to make larger batches, consider a travel mug that fits under the brewer.
Cleaning
Keeping your press-style plunger brewer clean is simple and essential for good-tasting coffee. Oils and coffee residue can build up over time and go rancid, affecting the flavor of your next brew.
- After each use, remove the filter cap and eject the spent coffee puck into the trash or compost. Rinse the chamber, plunger seal, and filter cap with hot water. A quick scrub with a sponge or soft brush removes any sticky oils.
- For a deeper clean—once a week or when you notice a stale smell—wash all parts (except the plunger seal if it is not heat-safe) in warm, soapy water. Use a mild dish soap and a soft brush or cloth. Avoid abrasive cleaners that could scratch the chamber or damage the seal.
- Clean the plunger seal carefully: pull it off the plunger rod, rinse it, and gently stretch it to remove any trapped grounds. Reattach it after drying.
- For metal filters, scrub the mesh with a dedicated brush to clear the pores. Soak in a solution of white vinegar and water (one part vinegar to three parts water) for a few minutes to dissolve mineral deposits if your water is hard. Rinse thoroughly.
- Allow all parts to air dry completely before reassembling. Storing the brewer wet can promote mold growth.
- If your brewer develops a stubborn coffee stain or an oily film, you can use a tablet designed for cleaning manual coffee equipment (follow the product instructions). Never put the brewer in a dishwasher unless the manufacturer explicitly states it is dishwasher-safe; the heat and detergent can deform the plastic chamber or damage the seal.
FAQ
Can I use a metal filter and a paper filter together?
Yes. Placing a paper filter on top of a metal filter can provide a cleaner cup while still allowing you to reuse the metal filter as the primary structure. Some brewers find that the paper filter sits better on a metal support than directly on the cap. Experiment to find what works for your taste and equipment.
What grind size works best for a press-style plunger brewer?
A medium-fine grind, similar to table salt, is a good starting point. If your coffee comes out bitter or the press is difficult, try a slightly coarser grind. If it tastes weak or sour, go finer. Adjust based on your preferred brew time and taste.
How do I prevent the plunger from sticking or leaking during the press?
Ensure the plunger seal is properly lubricated with a thin layer of water or a food-safe silicone lubricant (check your manufacturer’s guidance). Press slowly and evenly. If you notice leaking around the seal, the seal may be worn or the chamber may be cracked. Replace the seal with a compatible part.
What should I do if I accidentally spill hot water using the inverted method?
Immediately move away from the spill to avoid burns. Wipe up the water with a towel and let the area cool. If the spill is on your skin, run cool tap water over the affected area for several minutes and seek medical attention if the burn is severe. To prevent future accidents, always use the standard method if you are unsure about your handling technique.
Whether you choose the standard or inverted method, the right accessories can make your press-style plunger brewer more enjoyable and consistent. Start with a good filter, a simple funnel, and a scale, then expand your kit with a hand grinder for fresh flavor and a travel case for on-the-go brewing. For more details on manual brewing techniques, visit our guide to manual brewing.