By Claire Whitaker
Updated November 2026
A Keurig My K-Cup reusable coffee filter lets you brew your own ground coffee in a Keurig machine without buying single-serve pods. Once you know how to measure, fill, seal and clean it, you can get a fuller-flavored cup at a lower per-cup cost. This guide walks through each step, the common mistakes that cause bitter or gritty coffee, and how to keep the filter working well over time.
What a Keurig My K-Cup Reusable Coffee Filter Does
A reusable K-Cup-style filter is a small plastic or stainless basket that fits inside a Keurig pod holder. You add your own coffee grounds, close the lid, and the machine pushes hot water through the grounds the same way it does with a sealed pod. The filter mesh holds back the grounds while the brewed coffee drains into your mug.
The main advantage is control. You choose the bean, the roast and the grind, and you can change them from one day to the next. The main tradeoff is that the results depend heavily on how you fill and tamp the basket, which is why most of this guide focuses on those steps.
What You Need Before You Start
Gather these items before your first brew:
- A reusable K-Cup-style filter that matches your Keurig model (check the packaging or the machine’s manual for pod compatibility)
- Whole-bean coffee ground to a medium grind, or pre-ground coffee labeled for drip brewing
- A measuring spoon or small kitchen scale
- A butter knife or flat tool for leveling the grounds
- A soft brush or cloth for cleaning
Medium grind is the safest starting point. Coarse grounds can brew weak and sour, while very fine grounds can clog the mesh, slow the flow and push sediment into your cup.
Step-by-Step: How to Fill and Brew
Step 1: Measure your coffee
For an 8-ounce cup, start with about 2 level tablespoons of ground coffee, roughly 10 grams. For a stronger cup, move up to 12 to 14 grams. Filling by weight is more consistent than filling by volume, because the same scoop can hold quite different amounts depending on how finely the coffee is ground.
Step 2: Fill the basket without packing it
Spoon the grounds into the filter. Leave a little room at the top, and do not press the coffee down during filling. Heavy packing slows the water and can cause over-extraction, which tastes bitter.
Step 3: Level the grounds
Run a butter knife across the top of the basket so the grounds sit flat. Uneven beds let water channel through the thin spots, which leads to a weak and uneven brew.
Step 4: Tamp lightly, if at all
Many owners tap the side of the filter gently to settle the grounds. Avoid firm pressing. A light tap is enough to keep the surface even.
Step 5: Seal and brew
Wipe any loose grounds from the rim of the filter so the lid closes fully. Insert the filter into the pod holder, close the lid and select a cup size. Start with the smallest setting, since the machine’s strongest and fastest flow tends to produce the cleanest result from a basket that is not sealed by a foil pod.
Step 6: Taste and adjust
If the coffee tastes sour or thin, use a finer grind or a slightly larger dose. If it tastes harsh or bitter, use a coarser grind, reduce the dose or lighten the tamp. Change only one variable at a time so you can tell what helped.
Comparison: Reusable Filter vs Sealed Pod
| Factor | Reusable filter | Sealed pod |
|---|---|---|
| Bean choice | Any whole bean or ground coffee you buy | Limited to the pods you buy |
| Consistency | Depends on your dose and grind | Set by the manufacturer |
| Waste | Reusable basket, spent grounds go in compost or trash | Single-use plastic or aluminum pods |
| Cleanup | Requires rinsing after each use | Pod is discarded |
| Learning curve | Moderate; expect a few test brews | Very low |
How to Clean and Maintain Your Filter
Rinse the basket under warm water right after each brew, while the grounds are still soft. Use a soft brush to clear the mesh, paying attention to the edges where grounds collect. Dried coffee oils can build up and turn rancid, which adds off-flavors to fresh coffee.
Once a week, wash the filter with a mild dish soap and let it air dry fully before storing. If you notice a persistent film or smell, a short soak in a diluted vinegar solution can help. For detailed cleaning methods, see How to Clean Coffee Filters (2026): Reusable Cloth vs Paper Rinse Method and Hand Washing vs Vinegar Soak: How to Clean Reusable Coffee Filters (2026).
Common Mistakes to Avoid
- Overfilling the basket. Too many grounds can prevent the lid from closing and cause overflow or uneven extraction.
- Using grounds that are too fine. Espresso-fine coffee clogs the mesh and can leave sediment in the cup.
- Skipping the rinse. Old grounds turn bitter and can clog the filter over time.
- Packing the grounds hard. Pressing the coffee down slows the flow and over-extracts the bed.
- Brewing with a dirty machine. Mineral buildup in the needle and reservoir affects taste, so descale on the manufacturer’s schedule.
Tips for Better Results
- Buy whole beans and grind them just before brewing if you can. Freshness has a bigger effect than most upgrades.
- Keep a brew log with dose, grind setting, cup size and taste notes. It speeds up dialing in.
- Use filtered water. Water chemistry changes flavor, and a clean water source helps every cup.
- Store coffee in an airtight container away from heat and light.
If you still prefer disposable options at times, compare them with Keurig Coffee Filters: How to Brew Better Cups Without Pods to see which approach fits your routine.
Recommended Gear
- Keurig My K-Cup Reusable Coffee Filter: The filter designed for Keurig pod holders. Check the box to confirm it matches your brewer’s model before you buy. View on Amazon
- Digital kitchen scale: Weighing your dose gives repeatable results from cup to cup, which is easier than measuring by spoon. View on Amazon
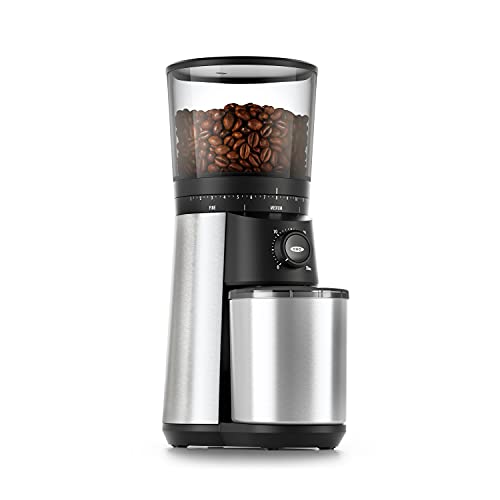
- Burr coffee grinder: A burr grinder produces more even particles than a blade grinder, which makes the filter’s results more predictable. View on Amazon
- Soft cleaning brush: A small brush clears mesh and corners without scratching the filter. View on Amazon
For more options, see 5 Best K Cup Reusable Coffee Filters for Keurig Brewers (2026) and Reusable Coffee Filters for Keurig: 5 Best Picks Compared in 2026.
FAQ
Will any reusable filter fit my Keurig?
Not always. Keurig machines use several pod designs over the years, so confirm that the filter is labeled for your brewer model or pod type before you buy.
How much coffee should I use in a reusable filter?
A common starting point is about 10 grams, or roughly 2 level tablespoons, for an 8-ounce cup. Adjust by 1 to 2 grams at a time based on taste.
Why does my coffee taste bitter?
Bitterness usually means over-extraction. Try a coarser grind, a smaller dose, or a lighter tamp. Also check that the filter is clean.
Why is my coffee weak or sour?
Weak or sour coffee often comes from under-extraction. Use a finer grind, a slightly larger dose, or a smaller cup size so the water has more contact with the grounds.
Can I use pre-ground coffee?
Yes. Pre-ground coffee labeled for drip brewing works well. Expect a bit less control than with whole beans ground at home, because you cannot adjust the grind.
How do I stop grounds from getting into my cup?
Keep the grind medium rather than fine, avoid overfilling, and make sure the mesh is clean and undamaged. Replace the filter if the mesh is torn.
How often should I replace the filter?
Replace it when the mesh tears, warps, or no longer rinses clean. Manufacturers specify replacement timing in their product guides, so check there for your model.
Is a reusable filter better for the environment?
A reusable basket generates less waste than single-use pods, though the spent grounds still need disposal. Composting them is a good option where it is available.
Conclusion
A Keurig My K-Cup reusable coffee filter gives you control over bean, grind and dose, which is its biggest advantage over sealed pods. Measure by weight when you can, fill without packing, level the bed, and rinse the basket after every use. Adjust one variable at a time, and you will find a repeatable cup that suits your taste.
Related reading
Ready to choose one?
About Claire Whitaker
Claire Whitaker is part of our editorial team and reviews and edits our coffee gear & accessories guides, checking product details against manufacturer specifications and owner feedback.