By Claire Whitaker
Updated November 2026
A milk frother for latte art can give you the glossy, paint-like microfoam you see in cafés, as long as you control temperature, texture and pour. This guide walks through the process in five steps, from choosing the right milk to pouring your first simple heart. Expect a few practice cups before the results look consistent.
What You Need Before You Start
Latte art depends on microfoam, which is milk with tiny, evenly distributed bubbles that blend into a velvety liquid. A milk frother for latte art is only one part of the setup. You also need cold whole milk, a pitcher with a fine pour spout, and a shot of espresso or strong brewed coffee in a wide cup.
Shopping for one? See our guide: 7 Best Milk Frothers and Steamers for Home Use (2026).
- Cold whole milk, straight from the refrigerator
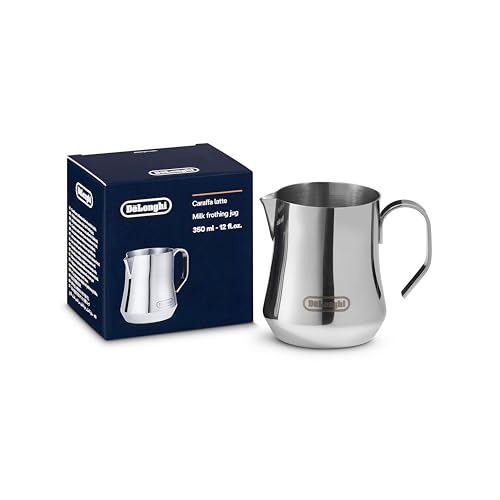
- A stainless steel frothing pitcher, roughly 12 to 20 ounces
- A thermometer for checking milk temperature
- Espresso or a concentrated coffee base in a cup with a flat surface
- A clean frother or steam wand, purged before use
How to Froth Milk for Latte Art: Step by Step
Step 1: Fill and Purge
Pour cold milk into the pitcher until it reaches the bottom of the spout, which leaves room to expand. Purge the frother briefly to clear any water or residue before you insert the pitcher.
Step 2: Create the Stretch
Place the frother tip just below the surface, slightly off-center, so you hear a gentle hiss. Hold this position for about 3 to 5 seconds while the milk volume rises by roughly a third. A tearing or screeching sound means the tip is too deep or too far from the surface.
Step 3: Roll the Milk
Lower the pitcher slightly so the tip sits near the edge of the milk, which creates a whirlpool. This rolling action breaks up large bubbles and smooths the texture. Stop frothing when the pitcher feels warm but not hot to the hand, around 140 to 150°F (60 to 65°C).
Step 4: Tap and Swirl
Tap the pitcher firmly on the counter twice to pop surface bubbles, then swirl for about 10 seconds. The milk should look like wet paint, with no foam ring or streaks. If you see distinct bubbles, keep swirling before you pour.
Pouring Technique for Basic Latte Art
Hold the pitcher about 2 inches above the cup and start with a steady, thin stream into the center of the espresso. When the cup is about half full, bring the pitcher closer to the surface and lift it slightly as you pour, which pushes the microfoam into a pattern. For a simple heart, pour a small white circle, then pull a thin line through it while you lower the pitcher.
Most beginners find that a steady pour and a consistent wrist motion matter more than speed. If you want a deeper look at texture and temperature, the guide How to Steam Milk for Lattes and Latte Art covers those details in more depth.
Common Mistakes to Avoid
- Using warm or partly skimmed milk, which makes foam less stable and harder to texture
- Keeping the tip too deep, which creates large bubbles instead of microfoam
- Overheating the milk above 160°F, which breaks down sweetness and flattens the foam
- Skipping the tap-and-swirl step, leaving visible bubbles on the surface
- Pouring too fast, which mixes the foam into the espresso before the pattern forms
Recommended Gear
- Stainless steel frothing pitcher: A narrow spout gives better control during the pour, which is the step that shapes the design. View on Amazon
- Digital milk thermometer: Checking temperature keeps you in the 140 to 150°F range and prevents scorched milk. View on Amazon
- Handheld milk frother: A compact option can help with small batches when you practice at home. View on Amazon
FAQ
Can I get latte art with a handheld milk frother?
Handheld frothers mainly create foam, not the fine microfoam needed for detailed patterns. You can still practice basic pours, but a steam wand or a jug frother with good texture control gives more reliable results.
Why does my milk look bubbly instead of glossy?
Bubbles usually mean the frother tip sat too deep or you skipped the swirl step. Keep the tip near the surface during stretching and swirl the pitcher for about 10 seconds after frothing.
What milk works best for latte art?
Whole milk gives the most stable and sweet microfoam, though some plant milks, such as barista-style oat milk, can also work. Always start with cold milk, and check the label on plant options for texture notes.
Conclusion
A milk frother for latte art rewards patience more than speed. Focus on a shallow stretch, a gentle roll and a consistent pour, and your patterns will improve with each cup. Keep a log of milk temperature and texture until you can repeat a good result reliably.
Related reading
- Milk Frother French Press: Make Latte-Style Coffee at Home in 5 Steps
- French Press as Milk Frother: 5 Easy Steps to Latte-Style Foam
- Best Electric Milk Frothers for Lattes at Home
- How to Steam Milk for Lattes and Latte Art
- Best Milk Frothing Pitchers for Latte Art
Ready to choose one?
About Claire Whitaker
Claire Whitaker is part of our editorial team and reviews and edits our coffee gear & accessories guides, checking product details against manufacturer specifications and owner feedback.