By Claire Whitaker
Updated November 2026
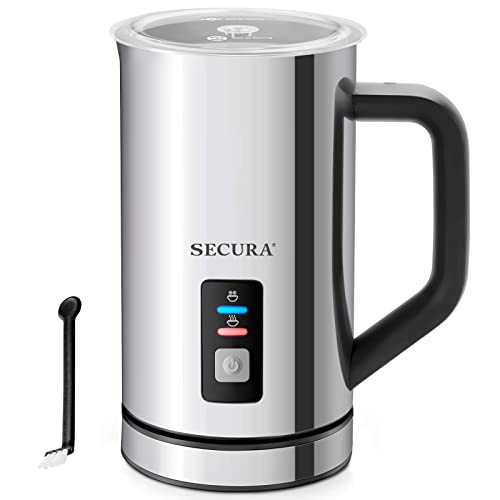
A milk frother and stand is a countertop setup that holds the frothing unit upright and keeps the cord, base and jug organized between uses. Choosing the right stand and using it correctly lets you make consistent foam for lattes, cappuccinos and hot chocolate without fumbling with a wobbly base. This guide covers what to check before buying, how to set up and froth, and the mistakes that cause flat or bubbly foam.
What to Check Before You Buy a Milk Frother and Stand
Start with the frother type. Electric jug frothers, handheld wands and steam-wand style units all behave differently, so the stand has to match the unit’s footprint and cord length. Measure the height of your frother with its lid on, and check that the stand’s cradle or base plate accepts it without tipping.
Shopping for one? See our guide: 7 Best Milk Frothers and Steamers for Home Use (2026).
Next, think about where it will live. A stand that sits flat on the counter next to your espresso machine should be low enough to clear upper cabinets. If you plan to store it, look for a stand with a cord wrap or a compact base.
How to Froth Milk on a Stand, Step by Step
- Fill the frother jug to the level marked for your drink. Most manufacturers specify a maximum fill line for foam, and overfilling can cause milk to spill when the foam expands.
- Use cold whole milk for dense microfoam, or a barista-style plant milk if you need a dairy-free option. Cold milk gives you more working time before it overheats.
- Seat the jug or wand firmly on the stand so it cannot shift during operation.
- Select the foam or heat setting, then start the cycle.
- When the unit signals it has finished, pour immediately. Foam begins to separate within a minute or two.
Getting Consistent Foam Every Time
Temperature and texture matter more than the stand itself. Most home baristas aim for milk between about 140°F and 150°F for lattes, and a thermometer helps you learn what that feels like. For a richer result, tap the jug on the counter after frothing to pop large bubbles and swirl the milk into a glossy, even texture.
If your foam looks coarse or dries out quickly, check whether the milk was too warm to start, the fill level was too high or the frothing disc or whisk is dirty. Each of these changes how air is incorporated into the milk.
Tips and Common Mistakes
- Do not run the frother dry. Most models shut off or overheat if the jug is empty.
- Wipe the stand base after each use so milk residue does not dry and hold the jug at an angle.
- Match the stand to your frother. A stand built for one model may not hold another securely.
- Avoid over-steaming. Milk that climbs above the target temperature tastes flat and sweet in a burnt way.
- Rinse the frothing parts right away, then clean them fully once a week.
Recommended Gear
A stable, correctly sized stand keeps the frother from wobbling on the counter during the cycle. View on Amazon
A small digital thermometer lets you hit your target temperature rather than guessing by touch. View on Amazon
A pitcher with a clear measurement line makes it easy to fill to the right level and pour with control. View on Amazon
FAQ
Do I need a stand if my milk frother already sits on the counter?
Not always. A stand helps when the frother is tall, has a long cord or tends to slide, because it keeps the unit steady and tidy. If the frother already sits flat and stable, you may not need one.
Can I use oat or almond milk in a milk frother?
Yes, but results vary by brand and milk. Barista-style plant milks usually froth better than standard versions, and you should follow the manufacturer’s guidance on fill level and temperature.
How often should I clean the frother and stand?
Rinse the frothing parts after every use and wipe the stand the same day. Many manufacturers recommend a deeper cleaning of the frothing parts once a week, or sooner if you froth daily.
Conclusion
A milk frother and stand works best when the stand fits your frother, the counter space and your daily routine. Use cold milk, respect the fill line and pour as soon as the cycle ends. Consistent foam comes from a few small habits rather than expensive equipment.
Related reading
- Smeg Milk Frother Guide: Better Foam at Home, Step by Step
- Nespresso Milk Frother: How to Get Silky Foam at Home
- Milk Frothers for Coffee: How to Choose and Use One Well
Ready to choose one?
About Claire Whitaker
Claire Whitaker is part of our editorial team and reviews and edits our coffee gear & accessories guides, checking product details against manufacturer specifications and owner feedback.