By Claire Whitaker
Updated November 2026
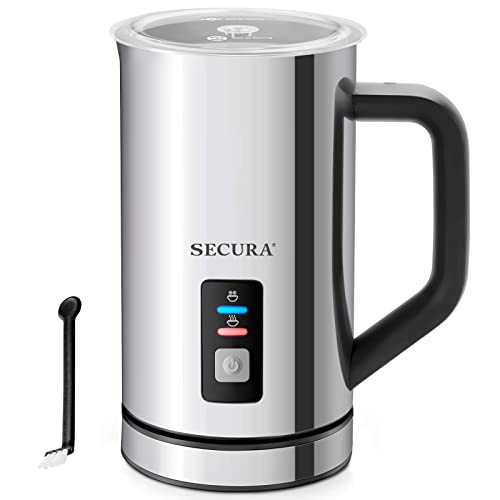
A milk heater and frother combines two jobs in one appliance: it warms milk to a drinkable temperature and whips air into it to create foam. Once you understand how these units handle heat and texture, you can make café-style lattes and cappuccinos without a full espresso machine. This guide covers how to choose one, how to use it, and how to avoid the mistakes that leave you with flat, scorched, or bubbly milk.
How a Milk Heater and Frother Works
Most units use one of two methods. Steam-style models push pressurized air through the milk while heating it, which produces dense, microfoam-like texture. Induction or heating-element models warm the milk in a jug or cup, and a separate whisk or spinning disc creates the foam. Either way, the goal is the same: milk that sits between roughly 140°F and 160°F with a smooth, glossy surface.
Shopping for one? See our guide: 7 Best Milk Frothers and Steamers for Home Use (2026).
Choosing the Right Milk Heater and Frother
Start with capacity. Manufacturers usually list a maximum fill line, and you should not exceed it, since foam expands as it heats. If you make drinks for two, a jug that holds around 8 to 12 ounces is practical. Next, look at the foam settings. A unit with separate hot and cold modes gives you more control, especially if you also make iced drinks.
Check the material of the jug and whether it is dishwasher safe. Stainless steel resists odors and holds heat well, while glass lets you watch the foam form. Also confirm that the heating base or power cord suits your kitchen outlets and counter space.
Step-by-Step: Making Foam at Home
- Pour cold milk into the jug only up to the max line, usually between half and two-thirds full.
- Use whole milk for the richest foam, or a barista-edition oat or soy milk if you avoid dairy. Fresh milk from the refrigerator works best.
- Select the frothing mode. Start the cycle and keep the jug steady on its base.
- Stop when the foam reaches the texture you want. Most users aim for a thin, velvety top rather than stiff, dry bubbles.
- Tap the jug gently on the counter and swirl it for ten seconds to smooth any large bubbles before pouring.
Checking Temperature Without Overheating
Milk scorches quickly above about 165°F, which tastes sour and flattens sweetness. If your unit lacks a built-in shutoff, use a frothing thermometer and stop the cycle near 150°F. Many people find this range gives a sweet, balanced latte.
Common Mistakes to Avoid
- Overfilling the jug, which causes foam to spill onto the heating base.
- Starting with warm or room-temperature milk, which produces weaker, less stable foam.
- Letting the unit run dry or skipping the rinse after each use, which leaves residue that affects future batches.
- Pouring immediately, which lets the foam separate from the milk underneath.
- Using skim milk expecting thick foam; it froths quickly but collapses faster than whole milk.
Recommended Gear
A frothing thermometer helps you hit the right temperature range consistently, which matters more than most people expect. View on Amazon
A stainless steel frothing pitcher with a pour spout gives you cleaner control when you transfer foam into your cup. View on Amazon
A small cleaning brush makes it easier to reach the whisk or steam wand and keep it free of dried milk. View on Amazon
FAQ
Can I use plant-based milk in a milk heater and frother?
Yes, but results vary by brand. Barista-edition oat and soy milks usually froth best, while thinner almond milk may produce less foam.
How long does it take to froth milk?
Most units finish a single batch in roughly one to three minutes, depending on the amount of milk and the mode you select.
How often should I clean the frother?
Rinse it after every use and do a deeper clean according to the manufacturer’s instructions. Milk residue left to dry can affect both taste and hygiene.
Conclusion
A milk heater and frother can give you consistent foam and warm milk with very little effort once you know the right fill level and temperature. Start with whole milk, stop before scorching, and clean the unit after each session. With a few practice rounds, your home lattes will improve noticeably.
Related reading
- Smeg Milk Frother Guide: Better Foam at Home, Step by Step
- Nespresso Milk Frother: How to Get Silky Foam at Home
- Milk Frothers for Coffee: How to Choose and Use One Well
Ready to choose one?
About Claire Whitaker
Claire Whitaker is part of our editorial team and reviews and edits our coffee gear & accessories guides, checking product details against manufacturer specifications and owner feedback.