By Claire Whitaker
Updated November 2026
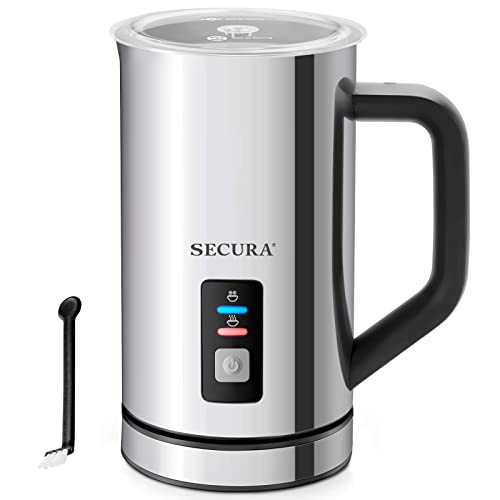
A milk frother stand alone is a countertop unit that heats and froths milk without needing a full espresso machine. This guide explains how these frothers work, how to pick one that fits your kitchen, and how to get consistent foam for lattes, cappuccinos and hot chocolate. Expect a few simple habits to make a bigger difference than the model itself.
How Stand-Alone Frothers Work
Most stand-alone units fall into two types. Heated frothers combine a small heating element with a whisk or magnetic stirrer, so the milk warms and aerates in one container. Non-heated frothers only aerate, so you warm the milk first on the stove or in the microwave. Heated models are more convenient for everyday use, while non-heated versions tend to be simpler and more compact.
Shopping for one? See our guide: 7 Best Milk Frothers and Steamers for Home Use (2026).
Foam quality depends on milk temperature, fat content and how far you let the froth expand. Manufacturers generally recommend heating milk to roughly 140–160°F (60–70°C) for the best texture. Above that, milk starts to lose its sweetness and the foam collapses faster.
Step-by-Step: Frothing Milk at Home
- Choose your milk. Whole milk produces the thickest, most stable foam. Many owners also report good results with barista-style oat and almond milks labeled for frothing.
- Fill the carafe no more than halfway. Milk roughly doubles in volume when frothed, so overfilling causes spills and weak foam.
- Set the frother to the right mode. Use the warm-and-froth setting for hot drinks, or the cold-foam setting if your model has one.
- Run a full cycle, then let the foam settle for 30 to 60 seconds. This lets large bubbles rise and gives you a smoother pour.
- Tap the carafe on the counter once or twice to pop surface bubbles, then pour the milk first and spoon the foam on top.
Choosing the Right Stand-Alone Frother
Match the frother to how you drink your coffee. If you make two or three drinks a day, a compact heated unit with a single froth setting is usually enough. If you host or want cold foam for iced drinks, look for multiple settings and a larger capacity.
| Feature | What to check | Why it matters |
|---|---|---|
| Heating | Heated or non-heated | Convenience versus simplicity |
| Capacity | Fill line marked on carafe | Prevents overflow and weak foam |
| Foam modes | Hot, cold, or both | Covers lattes and iced drinks |
| Cleaning | Removable whisk or dishwasher-safe parts | Keeps milk residue from building up |
Common Mistakes to Avoid
- Using cold milk straight from a refrigerator that has been opened recently, which can cause uneven heating.
- Skipping cleaning after each use, since dried milk protein clogs the whisk and affects foam.
- Overfilling the carafe past the marked line.
- Expecting dense microfoam from skim milk, which froths lighter and collapses faster.
- Running multiple cycles back to back without letting the unit cool, which can scorch the milk.
Recommended Gear
- A stand-alone heated frother with a clearly marked fill line helps you repeat results from one drink to the next. View on Amazon
- A cleaning brush sized for the whisk keeps milk residue out of tight spaces. View on Amazon
- A small thermometer lets you check milk temperature until you learn to judge it by touch. View on Amazon
FAQ
Can I froth plant-based milk in a stand-alone frother?
Yes, but results vary by brand. Look for milk labeled for frothing, since those formulas are designed to hold foam better than standard versions.
How long should I wait before pouring?
Let the foam settle for about 30 to 60 seconds after the cycle ends. This gives you a smoother, more even texture.
How often should I clean my frother?
Rinse it after every use and do a deeper clean weekly. Check the manufacturer’s instructions for parts that are safe to wash in the dishwasher.
Conclusion
A milk frother stand alone is an easy way to get café-style foam at home without a full espresso setup. Choose a model that matches how often you drink milk-based coffee, and stick to good milk, correct fill levels and regular cleaning. With those habits in place, your foam will improve quickly.
Related reading
- Milk Frother and Stand: How to Choose and Use One at Home
- Zulay Kitchen Milk Frother: Step-by-Step Guide to Foam at Home
- Zulay Kitchen Handheld Milk Frother: How to Get Foam at Home
- William Sonoma Milk Frother: How to Choose and Use One at Home
Ready to choose one?
About Claire Whitaker
Claire Whitaker is part of our editorial team and reviews and edits our coffee gear & accessories guides, checking product details against manufacturer specifications and owner feedback.