By Evelyn Lawson
As an Amazon Associate I earn from qualifying purchases. This page may contain affiliate links.
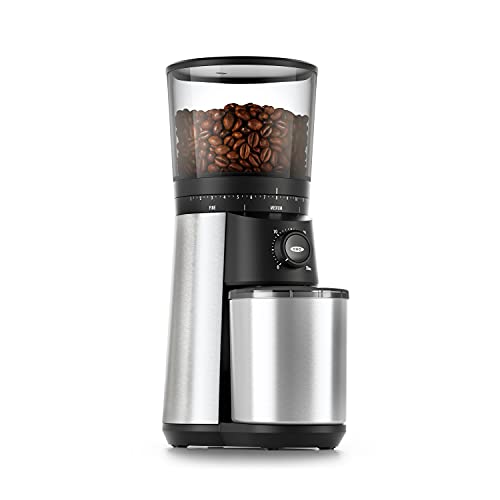
A Shardor 64mm flat burr grinder is built for home brewers who want even particles and repeatable results without stepping up to commercial equipment. In this guide, you will learn how to unpack and set up a Shardor 64mm flat burr grinder, how to find a starting grind size for different brew methods, how to dial in your coffee, and how to keep the burrs performing well over time. Manufacturer specifications and general burr grinder principles apply here, so check your own model’s manual for exact settings.
What a 64mm Flat Burr Grinder Does Differently
Flat burr grinders use two parallel ring-shaped burrs that crush beans between their grinding surfaces. Compared with conical designs, flat burrs tend to produce a more uniform particle distribution, which is one reason they are popular with pour-over and espresso enthusiasts. The 64mm figure refers to the burr diameter, and in general a larger burr can process beans more quickly at a given rotation speed, though real-world output depends on the motor, the roast and the grind setting.
For a deeper look at the design trade-offs, see Flat vs Conical Burr Grinders: What Actually Differs and Burr Coffee Grinders: Flat vs Conical Burrs, Consistency and Retention.
Step 1: Unbox and Prepare the Grinder
Before you grind any beans, take a few minutes to get the machine ready. Most burr grinders ship with protective packaging around the hopper, catch container and burr housing. Remove everything carefully and confirm that the parts listed in the manual are present.
- Remove packing material and any transit tape from the hopper, grinding chamber and bean feed.
- Wipe the hopper, lid and catch bin with a dry cloth. Avoid soaking any electrical component.
- Check that the grind adjustment ring or dial turns smoothly and is not stuck.
- Place the grinder on a stable, level counter with clearance above for the hopper lid.
- Read the safety section of your manual, especially regarding unplugging before cleaning.
Tools You Will Need
- A soft brush or small cleaning brush for removing grounds
- A dry microfiber cloth
- A digital scale accurate to 0.1 gram
- A timer or your phone’s stopwatch
- An airtight container for finished grounds
- Fresh whole coffee beans, ideally roasted within the last few weeks
Step 2: Run a Seasoning Batch
New burrs can carry manufacturing dust and oils. Many owners run a small batch of inexpensive or unwanted beans through the grinder first, then discard those grounds. Use roughly 20 to 30 grams for this purpose. This is a common practice recommended in many grinder guides, though you should confirm the advice in your manual.
Step 3: Choose a Starting Grind Size
Grind size controls extraction, so it is the most important setting you will adjust. Finer grounds increase surface area and slow water flow, while coarser grounds do the opposite. The table below gives general starting points for common brew methods. Treat these as rough guides, since beans, roast levels and water temperature all shift the ideal setting.
| Brew Method | Typical Grind Texture | Starting Point on the Dial |
|---|---|---|
| Espresso | Fine, like powdered sugar | Finest range, often the lowest numbers |
| Moka pot | Fine to medium-fine | Slightly coarser than espresso |
| Pour-over (V60 style) | Medium-fine, like table salt | Middle of the fine-to-medium range |
| Drip (flat-bottom) | Medium, like sand | Mid-range |
| French press | Coarse, like sea salt | Coarse end of the range |
| Cold brew | Very coarse | Coarsest setting |
Always verify dial numbering against your model’s official chart, since some Shardor-style grinders use different numbering systems or click counts.
Step 4: Dial In Your Coffee
Dialing in means making small adjustments until your brew tastes balanced. Use a consistent recipe so you can isolate the grind as the variable. A common pour-over starting point is a ratio of about 1:15 to 1:16 (coffee to water by weight), with water near 200 to 205°F. Weigh your dose on a scale before grinding.
- Set the grinder to your starting point for the brew method.
- Grind your dose and brew using your standard recipe.
- Taste the cup. If it tastes sour, thin or fast-draining, the grind is likely too coarse. Go finer.
- If it tastes bitter, harsh or muddy, or the brew drains very slowly, go coarser.
- Change the setting by one small step at a time, then brew again.
- Record your settings, bean name, dose and time so you can repeat good results.
Reading Brew Time as a Clue
For pour-over, many brewers aim for a total brew time of roughly 2.5 to 4 minutes, though this varies widely by recipe. If your brew finishes in under two minutes, the grind is probably too coarse. If it takes much longer, try a coarser setting.
Step 5: Grind, Store and Brew Consistently
Grind only what you need. Ground coffee loses aromatics quickly, so grinding immediately before brewing makes a noticeable difference. Keep beans in a sealed container away from heat and light. Avoid freezing and thawing beans repeatedly, since moisture can affect flavor.
Caring for Your Shardor 64mm Flat Burr Grinder
Routine cleaning keeps the grinder performing well and reduces stale oil buildup. Follow the cleaning method in your manual, and unplug the unit before accessing the burr area.
- Brush out grounds from the burr chamber after each session or every few uses.
- Clean the hopper and catch container with a dry or lightly damp cloth, drying completely before reassembling.
- Use a grinder cleaning tablet only if the manufacturer approves it.
- Check the burrs periodically for wear, chips or uneven grinding.
When to Think About Replacement Burrs
Burrs wear gradually. Signs include inconsistent grind sizes, increased fines or a grind that seems to need constant adjustment. For guidance, read When to Replace Coffee Grinder Burrs. Replacement parts should come from the manufacturer or a recognized supplier, and installation instructions should be followed closely.
Common Mistakes
- Changing too many variables at once. Adjust only the grind between tests so you know what caused each change.
- Grinding stale beans. Older coffee produces weaker aromatics regardless of grinder quality.
- Using an inconsistent dose. Weigh your coffee rather than scooping, since volume varies with bean density.
- Skipping cleaning. Oils and fines accumulate and can affect flavor and grind uniformity.
- Adjusting while the motor is running. Always power down before changing settings, unless your manual states otherwise.
- Ignoring static. Fine grounds can cling to surfaces. Tapping the catch container lightly can help reduce mess.
Tips for Better Results
- Keep a brew log. Note bean origin, roast date, grind setting, dose, water temperature and taste notes.
- Re-dial when you switch to a new bag of beans, since roast level and density change grind requirements.
- If you use a gooseneck kettle for pour-over, steady water flow pairs well with a consistent grind.
- Measure water temperature rather than guessing, especially if you brew at a range of temperatures.
Recommended Gear
The following accessories support grind and brew consistency. Choose based on your brew style and what you already own.
- Digital pocket scale with 0.1 g resolution. Weighing coffee and water keeps your recipe repeatable, which makes dialing in far easier. View on Amazon
- Gooseneck kettle with temperature control. A steady pour and accurate water temperature help you judge whether changes come from the grind or the brew. View on Amazon
- Airtight canister for whole beans. Limiting air and light exposure helps protect flavor between grinding sessions. View on Amazon
- Soft grinder brush kit. Regular brushing keeps the burr chamber clear of old grounds. View on Amazon
If you are comparing this grinder with other options, Shardor Electric Burr Coffee Grinder 2.0: 8 Best Picks for Home Brewing (2026) and 5 Best 80mm Flat Burr Grinders for Home Brewing (2026) offer useful context on alternatives.
FAQ
Is a 64mm flat burr grinder good for espresso?
It can be, provided the grinder offers fine enough settings and stable motor performance. Espresso requires very fine, consistent grounds, so test carefully and check the manufacturer’s espresso recommendations.
How often should I clean the burrs?
Brush out the chamber after every few uses or whenever grounds build up. Deep cleaning intervals depend on use and oil content of your beans, so follow your manual’s guidance.
Why does my coffee taste sour after changing the grind?
Sourness usually signals under-extraction, which often means the grind is too coarse or the brew time too short. Try a slightly finer setting and retest.
Should I weigh coffee or measure by scoop?
Weighing is more consistent because beans vary in size and density. A scale makes dialing in and repeating recipes much easier.
Can I grind spices in this grinder?
Manufacturers commonly advise against grinding spices in burr grinders because oils and strong aromas can transfer to coffee and may stress the burrs. Check your manual before attempting it.
What causes inconsistent grind size?
Worn burrs, loose adjustment settings, a dirty chamber or very fine dust buildup can all contribute. Clean the grinder first and inspect the burrs if problems continue.
Do I need a special grinder cleaning product?
Often no. Brushing and dry cleaning are sufficient for routine care. Only use cleaning tablets or products if the manufacturer specifically allows them.
Conclusion
A Shardor 64mm flat burr grinder rewards careful setup, methodical dialing in and regular cleaning. Start with a sensible grind for your brew method, change one variable at a time and keep notes on what tastes best. With consistent habits, your grinder can help you produce repeatable, balanced cups at home.

About Evelyn Lawson
Evelyn puts together our coffee gear & accessories guides, digging through specifications, manufacturer details and owner reviews so you don't have to.