By Claire Whitaker
Updated November 2026
Latte art using milk frother is easier than most people expect, as long as you focus on one thing first: silky microfoam. With the right milk, a frother that produces fine bubbles, and a steady pour, you can move from blobs of foam to recognizable hearts and rosettas within a handful of attempts. This guide covers what you need, how to texture milk, and how to pour.
What You Need Before You Start
Gather your tools so you are not hunting for them while the milk cools. Most home setups need only a few items.
Shopping for one? See our guide: 3 Best Handheld Electric Milk Frothers for Home Lattes (2026).
- A milk frother that heats and textures milk, such as a steam-capable frother or an electric frother with a heating function
- Cold whole milk, straight from the refrigerator
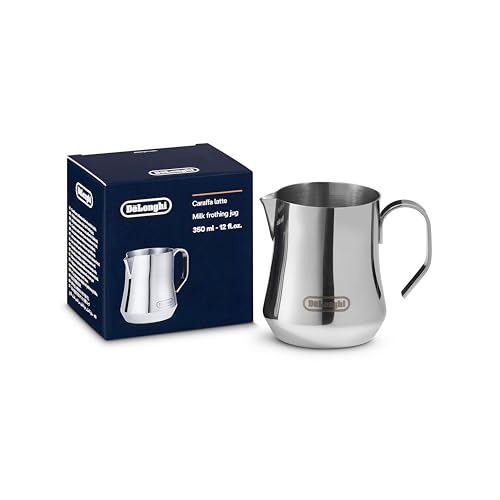
- A stainless steel pitcher with a sharp spout, sized so the milk fills it about one-third to halfway
- A thermometer, if your frother does not display temperature
- Freshly brewed espresso or strong coffee in a cup ready to receive the milk
Whole milk gives the most stable foam because its fat and protein structure holds bubbles well. Plant-based milks can work, but barista editions formulated for foaming perform far better than standard cartons.
Step 1: Prepare the Milk and the Frother
Pour cold milk into the pitcher until it reaches about one-third of the volume. Wipe the frother wand or whisk so no residue affects the texture. If your device is a steam wand, purge it briefly before inserting it into the milk to clear any condensed water.
Step 2: Create Microfoam in the First Few Seconds
Position the frother just below the surface, angled so the milk spins into a gentle whirlpool. You want to introduce a small amount of air, which should sound like a soft hiss or paper tearing. Aim for about 10 to 15 seconds of aeration, or until the pitcher feels slightly warmer than your hand.
Too much air creates a stiff, bubbly foam that sits on top of the milk instead of blending into it. If you hear loud, gurgling noises, lower the wand deeper into the milk to reduce the air intake.
Step 3: Heat and Swirl to Silky Texture
Once the milk reaches roughly 55 to 65 degrees Celsius, which is about 130 to 150 degrees Fahrenheit, stop aerating. Keep the wand submerged to continue spinning the milk so the bubbles break down into uniform microfoam. Tap the pitcher on the counter to pop surface bubbles, then swirl the milk until it looks like wet paint with a glossy sheen.
Temperatures above about 70 degrees Celsius scald the milk, which tastes flat and sweet in a bad way and makes the foam collapse quickly. Use a thermometer until you learn to judge by feel.
Step 4: Pour with a Steady Hand
Pour the espresso or coffee first so the crema or surface is ready. Hold the pitcher close to the cup and start with a higher, thin stream to mix the milk into the coffee. Then lower the spout close to the surface and pour more slowly as the cup fills.
- Tilt the cup slightly and pour a small amount in the center to create a base.
- Bring the pitcher closer to the surface and shake gently to float the foam.
- For a heart, pour steadily into the center, then finish by pulling the pitcher through the design.
- For a rosetta, shake a little more, pour in a wave pattern, and pull through the center at the end.
Common Mistakes to Avoid
- Using milk that is not cold enough. Warm milk texture poorly and foams unevenly.
- Keeping the wand too high, which whips in too much air and creates large bubbles.
- Overheating the milk. Stop once it reaches your target range, even if it still looks thin.
- Letting milk sit after texturing. Pour within about a minute before the foam separates.
- Pouring too fast at the end. A slow, controlled finish gives you a clean design instead of a muddy mess.
Recommended Gear
A frother that produces consistent microfoam makes the biggest difference for beginners, since it removes much of the guesswork in timing and temperature.
- Stainless steel frothing pitcher: A narrow spout gives you control over the stream, which is essential for shaping hearts and rosettas. View on Amazon
- Digital milk thermometer: Helps you hit the 55 to 65 degree Celsius window without scalding. View on Amazon
- Electric milk frother with heat: Automates aeration and heating, so you can focus on pouring. View on Amazon
FAQ
Can I make latte art with a handheld milk frother?
A handheld frother can create foam, but it usually produces bubbles that are too large for fine designs unless you heat and swirl the milk carefully afterward. Steam wands or heated frothers give more consistent microfoam for art.
Why does my foam keep separating?
Separation usually means the milk has too much air or has been left to sit too long. Swirl the pitcher to recombine the foam and milk, and pour within about a minute of texturing.
What is the best temperature for milk in latte art?
Most baristas aim for about 55 to 65 degrees Celsius, or 130 to 150 degrees Fahrenheit. Milk heated above roughly 70 degrees Celsius tends to taste scalded and foam poorly.
Conclusion
Latte art using milk frother comes down to cold milk, gentle early aeration, and steady swirling until the texture is glossy and smooth. Practice the pour on a few cups before worrying about complicated patterns. Once your microfoam is consistent, the designs follow more easily.
Related reading
- Milk Frother for Latte Art: 5 Steps to Silky Microfoam at Home
- Steam Frother for Milk vs Handheld Frother: Which Is Better for Home Lattes?
- Milk Frother French Press: Make Latte-Style Coffee at Home in 5 Steps
Ready to choose one?
About Claire Whitaker
Claire Whitaker is part of our editorial team and reviews and edits our coffee gear & accessories guides, checking product details against manufacturer specifications and owner feedback.