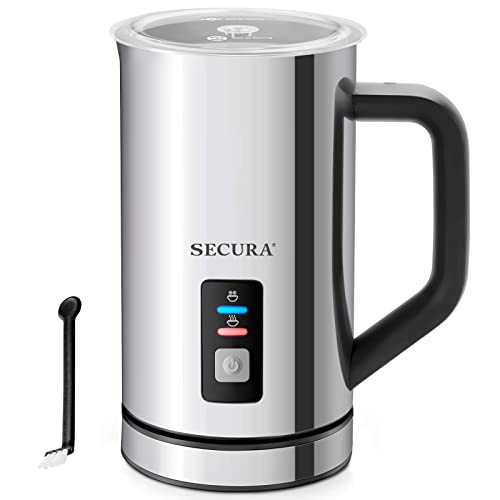
By Claire Whitaker
Updated November 2026
A milk frother almond milk setup can produce foam that is light, creamy and stable enough for a latte or cappuccino, as long as you pick the right almond milk and adjust your technique. Almond milk behaves differently from dairy because it has less protein and fat, so it foams with fewer, larger bubbles and collapses faster. This guide walks through the steps that make a difference.
Choose the Right Almond Milk
Barista-style almond milk labeled for foaming usually works better than a standard carton. These versions often include added stabilizers and emulsifiers that help the foam hold its shape. Unsweetened varieties are the easiest to work with because sugar can change how the foam tastes and how quickly it breaks down. Shake the carton well before pouring, since the solids settle during storage.
Shopping for one? See our guide: 7 Best Milk Frothers and Steamers for Home Use (2026).
Prepare Your Frother and Milk
Start with cold almond milk straight from the refrigerator. Pour in the amount you need, but avoid filling the vessel more than halfway, because the foam will expand. For a single latte, 4 to 6 ounces is a practical starting volume in most frothing jugs.
- Chill your frothing pitcher or jug if possible, since cold metal slows the milk from overheating.
- Pour cold almond milk to about one-third to one-half of the vessel’s capacity.
- Wipe any drips from the frother head or whisk before you start.
- Choose the foam setting if your device has one, or a short, gentle cycle for manual models.
Froth Almond Milk Step by Step
Almond milk foams best when you introduce air gently at first and keep the temperature moderate. Heating it too far is the most common reason the foam collapses.
Step 1: Build the Foam
Position the frother so the whisk or wand sits just below the surface. Keep it near the top of the milk for the first 10 to 15 seconds so air incorporates evenly. A slightly tilted vessel can help the milk circulate.
Step 2: Heat Gently
Move the frother slightly deeper once the foam has formed, and stop when the milk reaches roughly 140 to 150°F. Almond milk can scorch above that range, which gives a flat, slightly bitter taste. A thermometer makes this much easier to judge.
Step 3: Tap and Swirl
Tap the jug on the counter a few times to pop large bubbles, then swirl the milk to blend the foam and liquid. This gives the glossy, uniform texture you want before pouring.
Common Mistakes to Avoid
- Using warm almond milk, which makes the foam collapse faster.
- Overheating past about 150°F, which can cause a burnt or flat taste.
- Overfilling the pitcher, so the foam spills or the frother can’t move the milk properly.
- Skipping the tap-and-swirl step, leaving large bubbles on top.
- Assuming all plant milks behave the same. Oat milk often froths more easily than almond.
Recommended Gear
A stainless steel frothing pitcher with a clear volume marking helps you measure milk consistently and see the foam level as it grows. Look for a model with a spout that gives you control while pouring.
A thermometer clipped to the pitcher lets you stop heating at the right point, which matters more with almond milk than with dairy. View on Amazon
If you use a handheld frother, a model with a short, wide whisk head is better suited to small volumes of almond milk. View on Amazon
FAQ
Can I use any almond milk in a milk frother?
Not every carton will foam well. Barista-labeled or foaming almond milks usually produce more stable results than regular unsweetened versions.
Why does my almond milk foam disappear so quickly?
Almond milk has less protein than dairy, so its foam is less stable. Heating it too much, or using warm milk to start, makes the collapse faster.
Should I froth almond milk hot or cold?
For a hot drink, froth it cold and heat it in the same step, stopping around 140 to 150°F. For cold foam, skip the heating and use the frother only until the foam is thick.
Conclusion
A milk frother almond milk routine works well once you match the milk to the job, keep it cold at the start, and watch the temperature. Small adjustments to volume and heat usually make the biggest difference. With a little practice, you can get foam that holds up in your coffee.
Related reading
- Smeg Milk Frother Guide: Better Foam at Home, Step by Step
- Nespresso Milk Frother: How to Get Silky Foam at Home
- Milk Frothers for Coffee: How to Choose and Use One Well
Ready to choose one?
About Claire Whitaker
Claire Whitaker is part of our editorial team and reviews and edits our coffee gear & accessories guides, checking product details against manufacturer specifications and owner feedback.