By Claire Whitaker
Updated November 2026
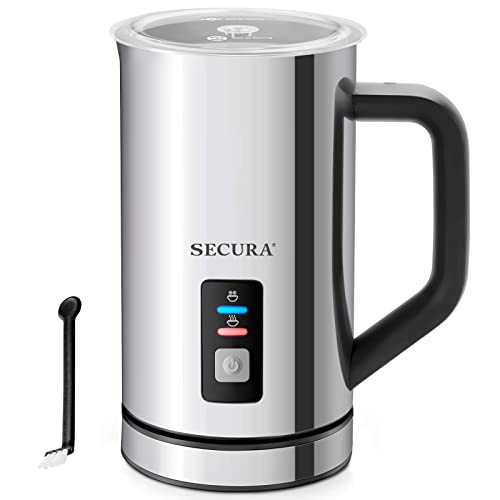
A milk frother and jug combination lets you turn cold milk into smooth, velvety foam for lattes, cappuccinos and flat whites without an espresso machine’s steam wand. The key is choosing the right jug size, using the correct milk temperature and frothing in short, controlled bursts. Follow the steps below and you will get consistent microfoam with far less mess.
Choose the Right Jug and Milk
Start with a jug sized for your frother. Most manufacturers list a maximum and minimum fill line, and staying between those marks matters because milk expands as it froths. Overfilling is the most common cause of spills and weak foam.
Shopping for one? See our guide: 7 Best Milk Frothers and Steamers for Home Use (2026).
Whole milk produces the thickest, most stable foam because its fat and protein content gives the bubbles structure. Semi-skimmed milk works well too. Skim milk foams quickly but holds its shape for less time. Plant milks behave differently, so see How to Froth Oat, Almond and Other Plant Milks for adjustments.
Step-by-Step Frothing Method
- Pour cold milk into the jug up to the minimum line for a small drink, or the midpoint for a larger one.
- Wipe the frothing whisk or disc and check that it is seated correctly.
- Place the jug on the base or insert the handheld frother so the tip sits just below the surface, slightly off-center.
- Start the frother and hold the jug steady for 20 to 30 seconds while the foam builds.
- Lower the whisk slightly once the volume increases, so the foam mixes into the milk and smooths out.
- Stop when the jug feels hot to the touch, around 60 to 65 °C (140 to 150 °F), or when the milk reaches your preferred temperature.
- Tap the jug on the counter once to pop large bubbles, then swirl gently before pouring.
Control Temperature and Texture
Temperature is what separates pleasant milk from scalded milk. Milk that exceeds roughly 70 °C (160 °F) starts to taste flat and sweet-burnt. A simple kitchen thermometer, checked after each batch, removes the guesswork. Find more guidance in Milk Frothing Thermometers and Target Milk Temperatures.
For texture, aim for glossy microfoam with no visible large bubbles. If you see a stiff, dry layer on top, you added too much air. If the foam collapses quickly, you may have stopped too early or used milk that was not cold enough at the start.
Frothing Tools Compared
| Tool | Best for | Main limitation |
|---|---|---|
| Jug frother (electric base) | Hands-free, consistent results | Fixed capacity |
| Handheld frother | Single drinks, small kitchens | Needs a steady hand |
| Manual plunger frother | No power needed | More effort, less uniform foam |
Common Mistakes
- Using warm or room-temperature milk, which makes foam collapse faster.
- Frothing for too long, which overheats the milk and creates a dry, stiff texture.
- Leaving milk residue in the whisk, which can sour and affect taste on the next use.
- Filling the jug past the maximum line.
- Pouring foam before swirling, which leaves a layer of air on top.
Recommended Gear
A jug frother with a clear capacity guide makes portioning easy for daily use. View on Amazon is a widely known option among home baristas who want hands-free results.
A kitchen thermometer that reads quickly helps you hit the right temperature without guessing. View on Amazon is a popular choice for fast readings.
A stainless steel frothing pitcher gives you good control when pouring latte art. View on Amazon is commonly chosen for home use.
FAQ
Can I use a milk frother and jug with non-dairy milk?
Yes, but results vary by brand. Oat and soy milks often froth well, while some almond milks produce thinner foam. Check the milk’s labeling for barista versions designed for frothing.
How much milk should I put in the jug?
Fill to the minimum line for a single cup and to the midpoint or the maximum line for larger drinks. Follow the manufacturer’s stated capacity for your model.
Why does my foam disappear so quickly?
This usually means the milk was too warm or too skim, or you stopped frothing too early. Chill the milk well and froth until it is just hot to the touch.
Conclusion
Using a milk frother and jug well comes down to correct fill levels, cold starting milk and a controlled temperature. Practice a few batches and adjust your timing until the texture matches your taste. Clean the whisk after every use to keep the flavor clean and the frother working reliably.
Related reading
- Electric Milk Frothers: Jug Frothers, Hot and Cold Foam
- Smeg Milk Frother Guide: Better Foam at Home, Step by Step
- Nespresso Milk Frother: How to Get Silky Foam at Home
Ready to choose one?
About Claire Whitaker
Claire Whitaker is part of our editorial team and reviews and edits our coffee gear & accessories guides, checking product details against manufacturer specifications and owner feedback.